Vapi Voice Service Integration
Welcome to the TIXAE Agents Vapi Voice Service integration guide! This document will help you quickly connect and configure the Vapi Voice Service with TIXAE Agents, allowing you to leverage voice interactions powered by AI.What is Vapi Voice Service?
Vapi Voice Service is a powerful tool that enables voice-based interactions through AI and language models. It provides robust capabilities for processing and interpreting spoken language, making it an ideal solution for voice-based customer interactions.Why Integrate Vapi with TIXAE Agents?
Voice interactions can significantly improve user engagement and satisfaction. Consider using voice channels for scenarios where typing might be inconvenient or impossible for users.
- Enhance customer experiences through conversational voice interactions
- Leverage advanced AI-powered voice recognition and response capabilities
- Improve efficiency and reduce response times for common customer queries
Prerequisites
Need Help Setting Up?
Our integration specialists are available to guide you through the Vapi setup process. Reach out for personalized assistance!
- An active TIXAE Agents account with permissions to integrate third-party services.
- Access to a Vapi Voice Service account.
Steps to Integrate Vapi with TIXAE Agents
Make sure to keep your API keys secure and never share them publicly. Consider using environment variables for additional security.
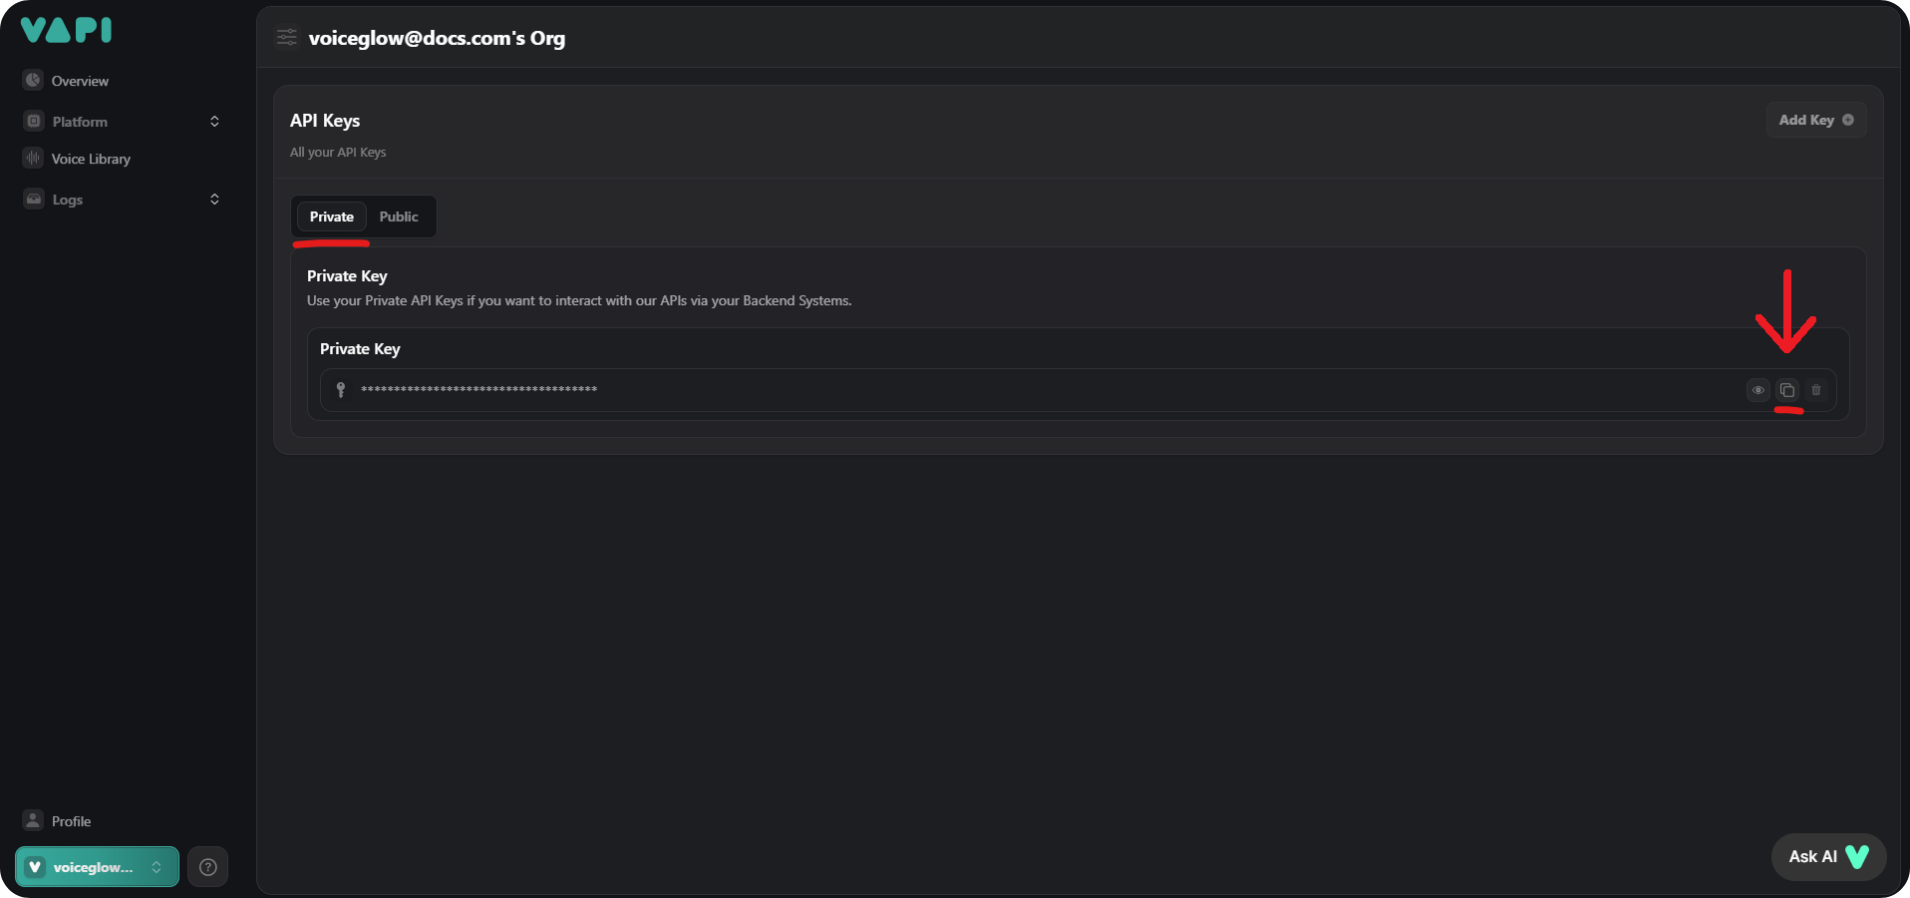
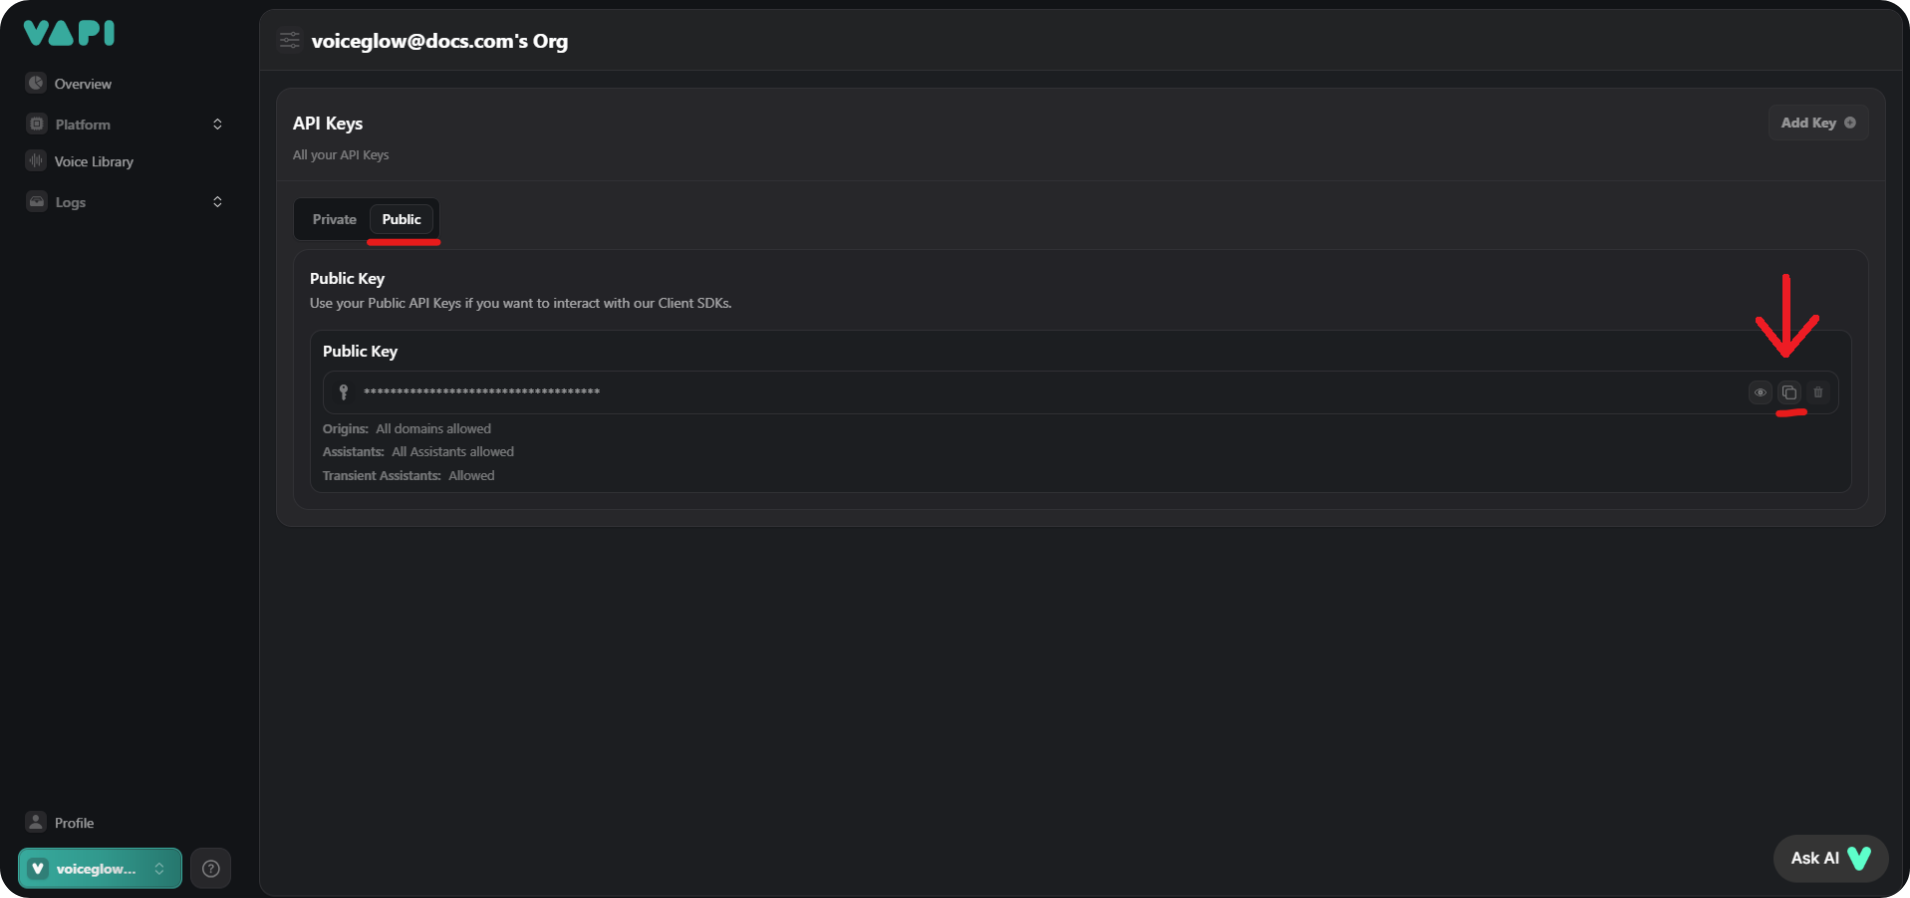
Step 1: Access the Vapi Dashboard and Retrieve API Keys
- Sign in to your Vapi Voice Service account.
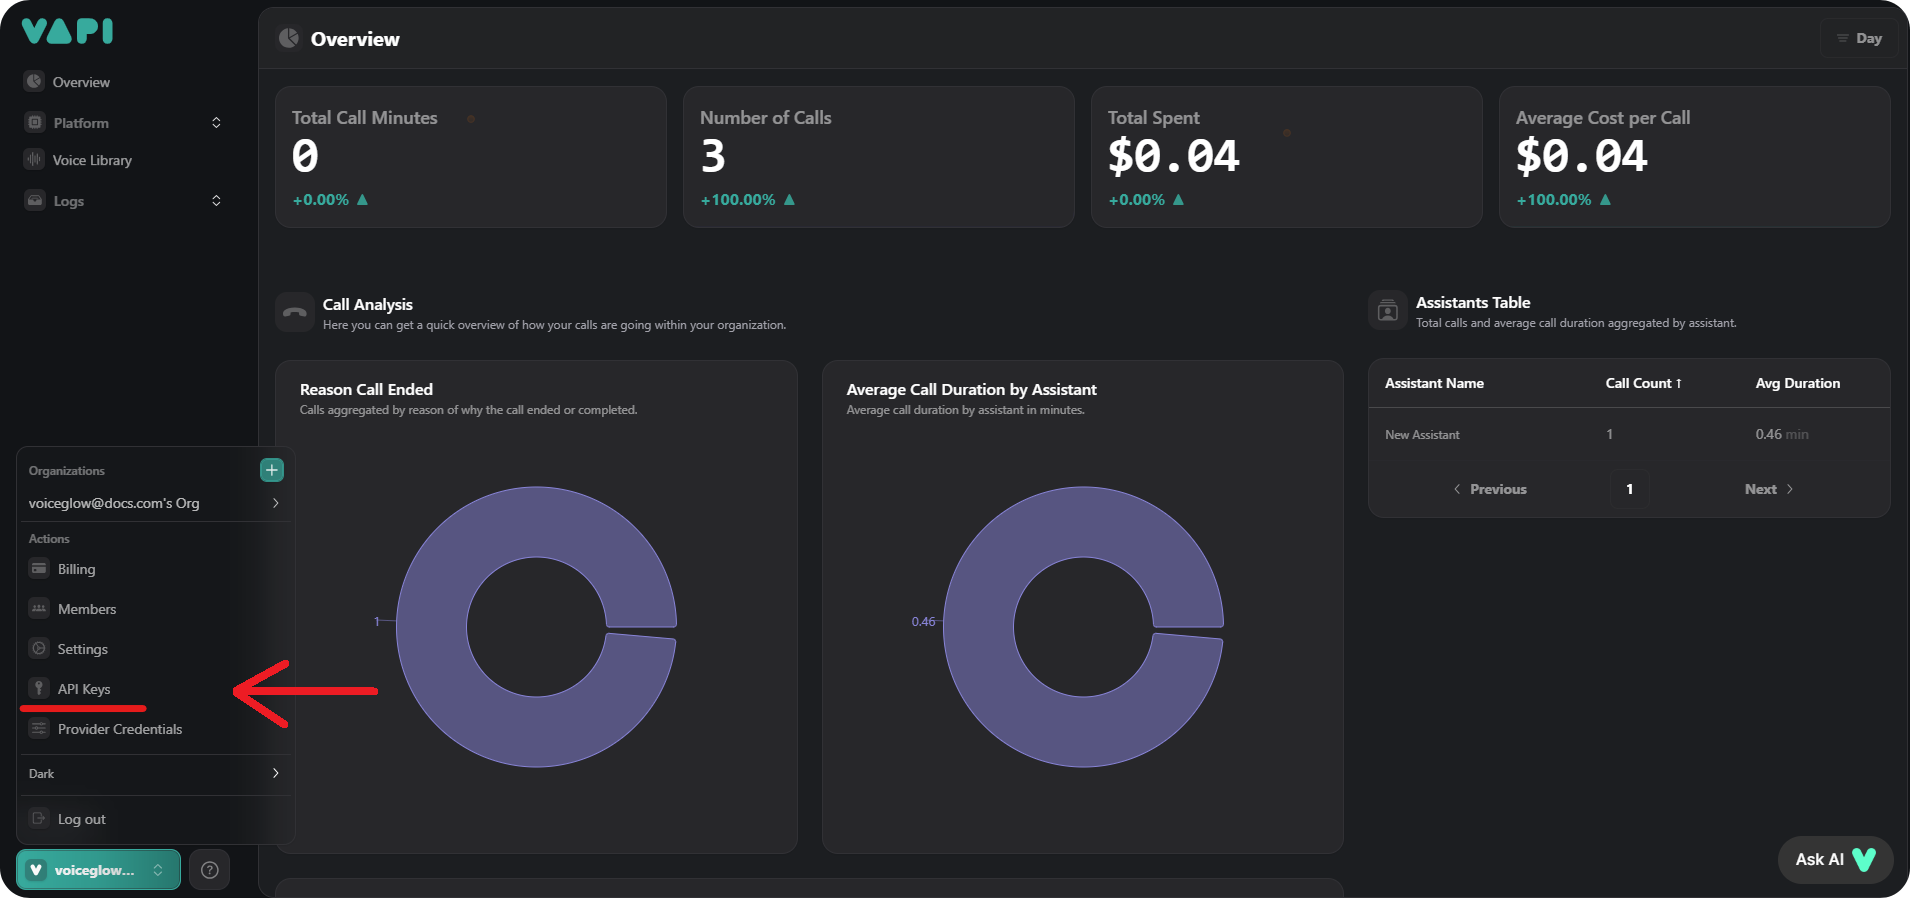
- In the profile menu, navigate to the API Keys page.
- On the API Keys page, locate both your Public API Key and Private API Key.
Step 2: Configure TIXAE Agents for Vapi Integration
- Log in to your TIXAE Agents account.
- Go to the Credentials tab.
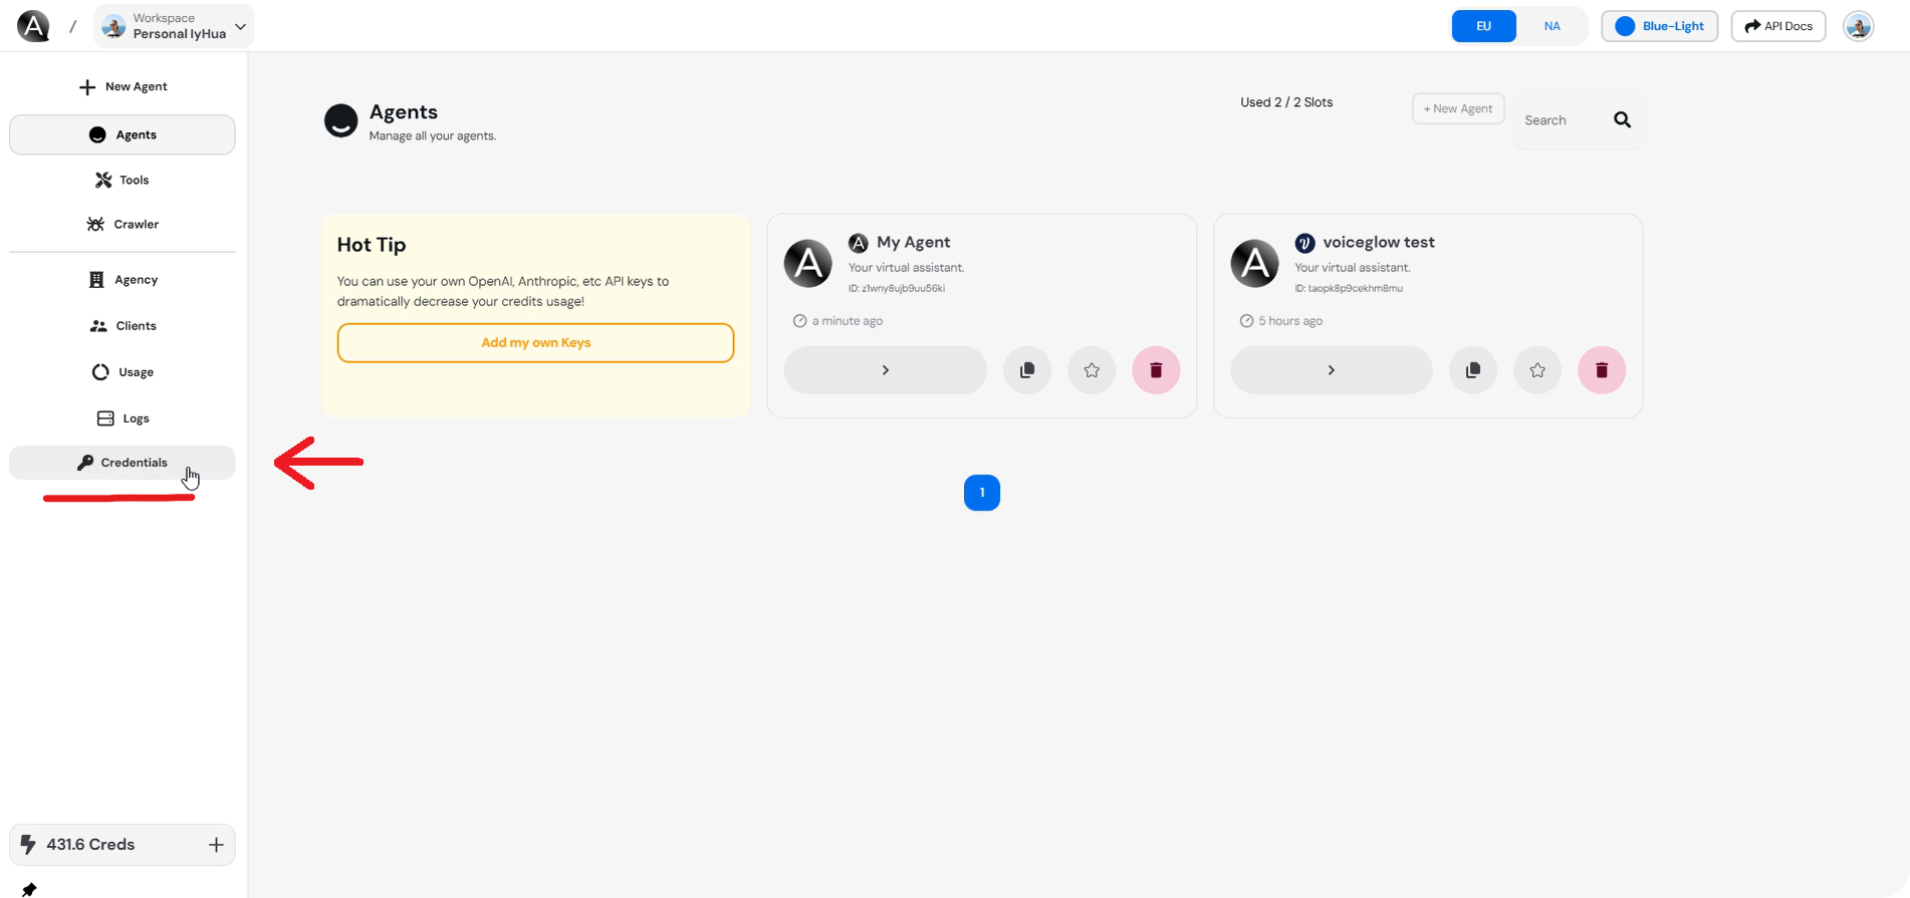
- In the VAPI Credentials section, enter your Public API Key and Private API Key that you retrieved from the Vapi dashboard.

- Click the “Save” button to store your credentials.
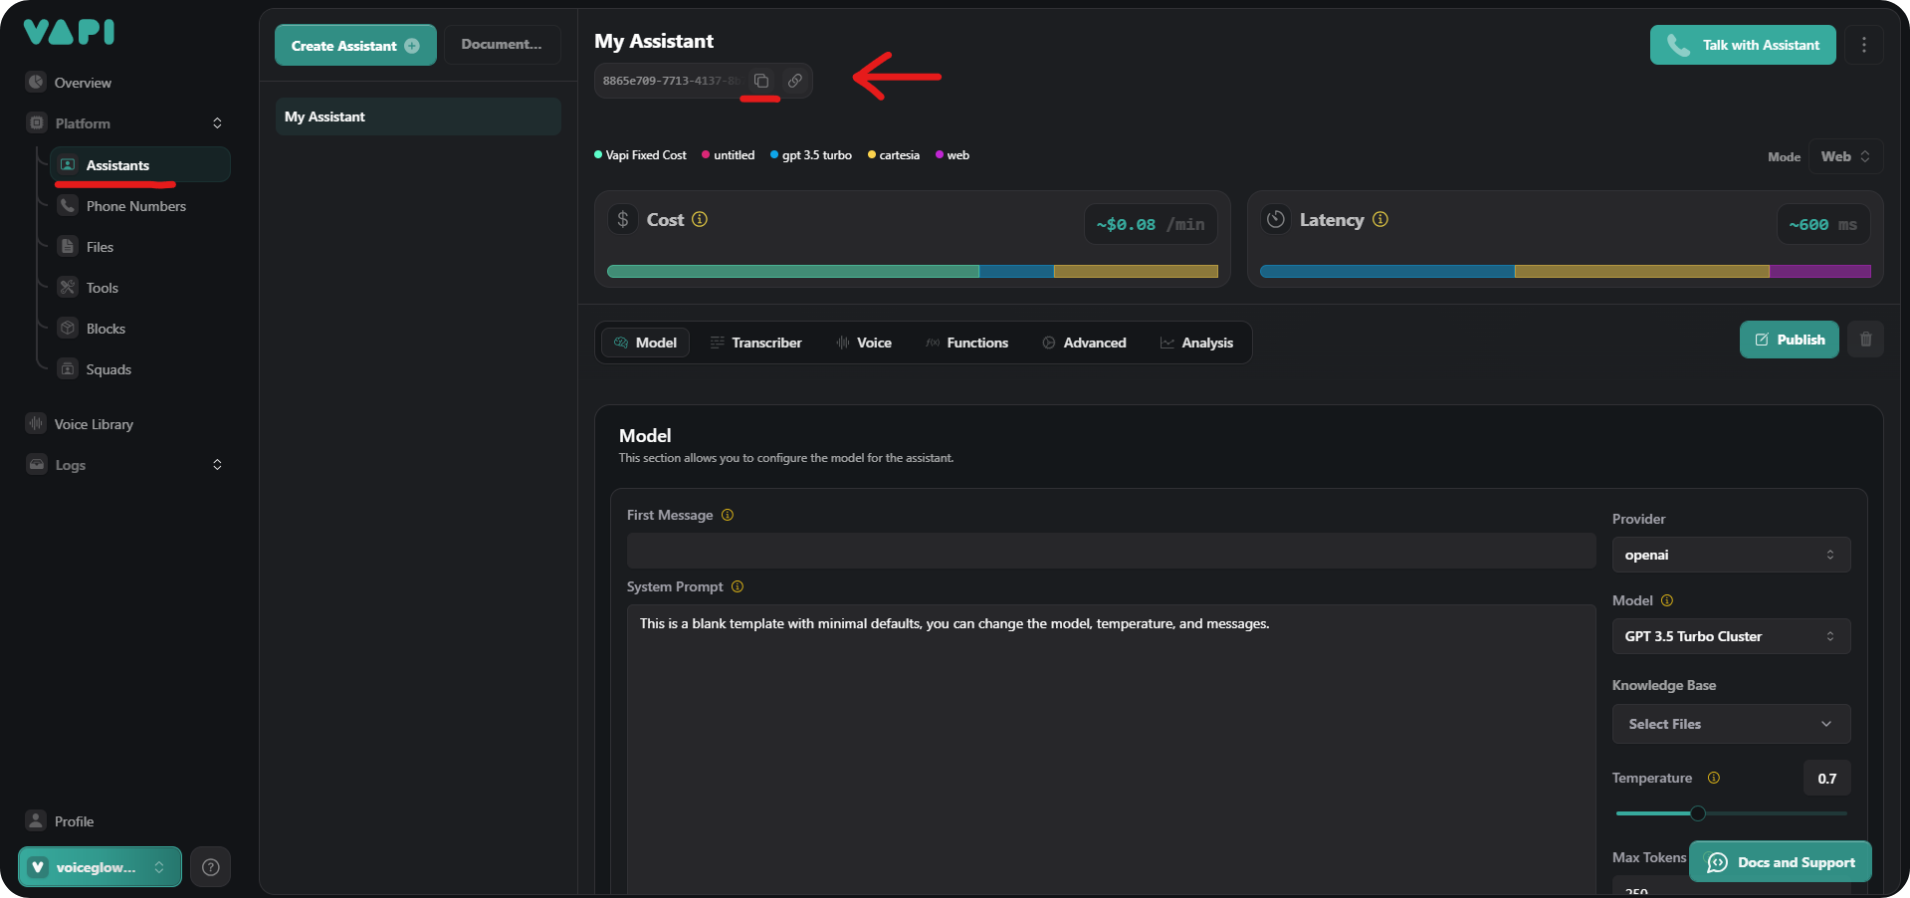
Step 3: Retrieve the Assistant ID from Vapi Dashboard
- Go back to your Vapi Voice Service dashboard.
- Navigate to Platform > Assistants.
- Select your assistant, and copy the Assistant ID from the assistant’s details page.
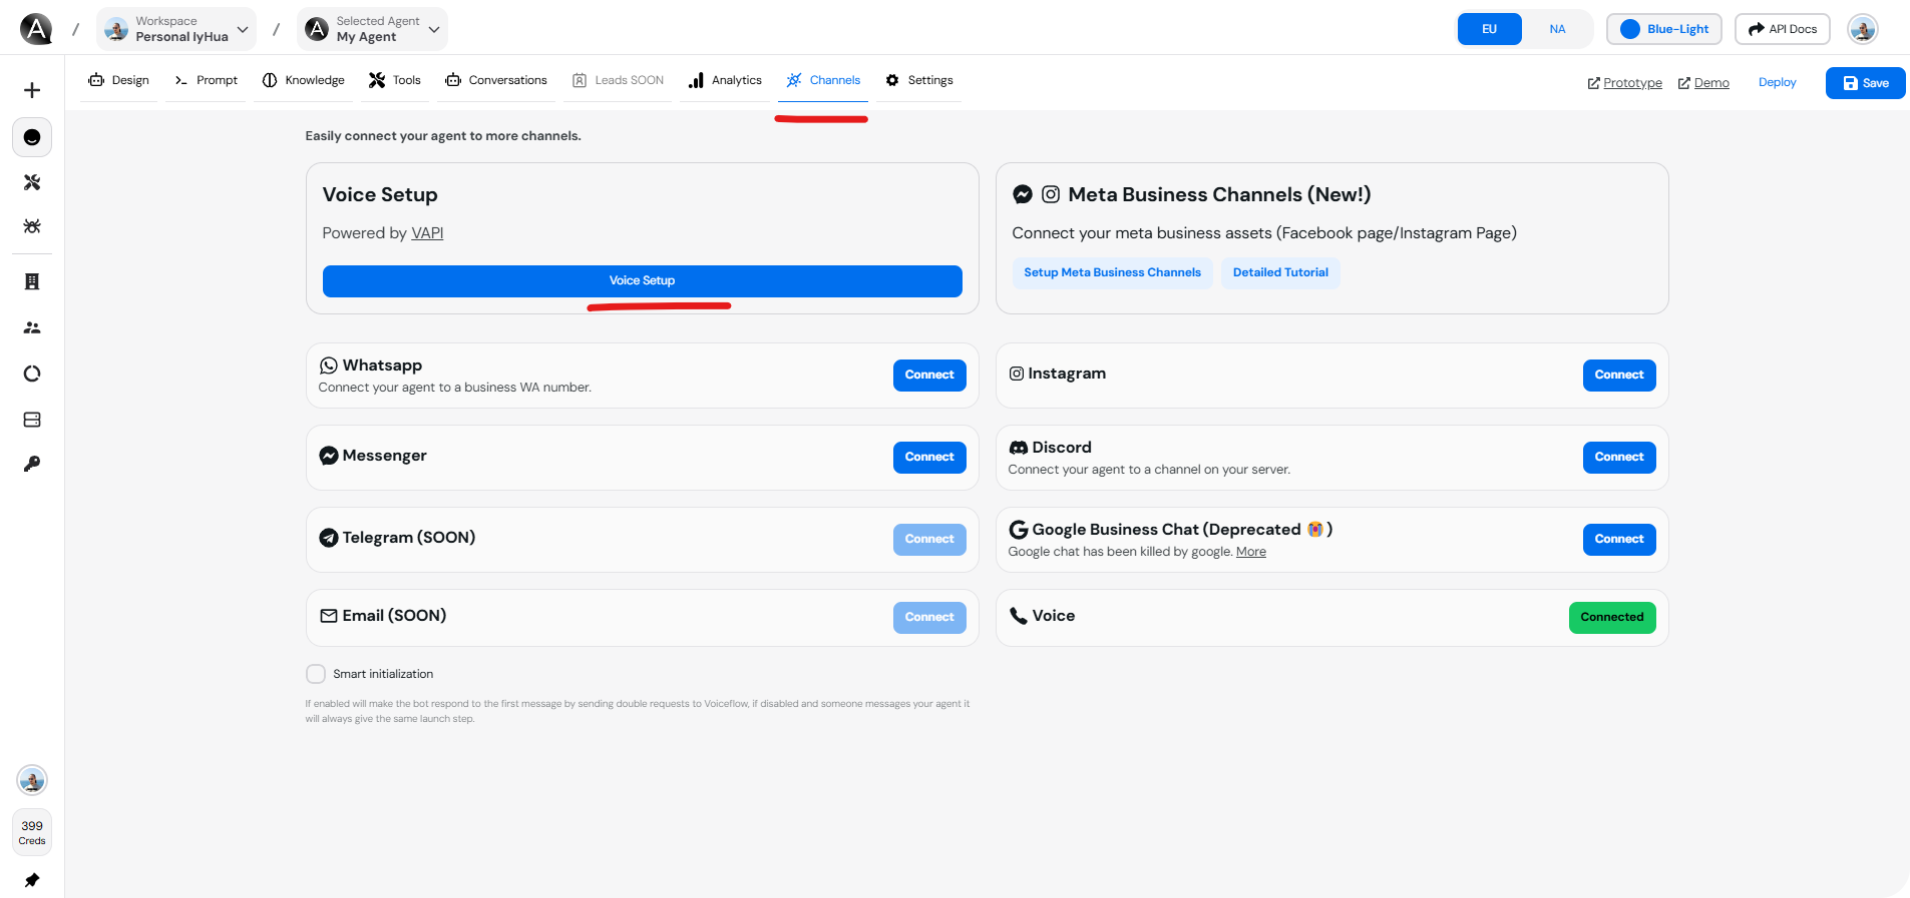
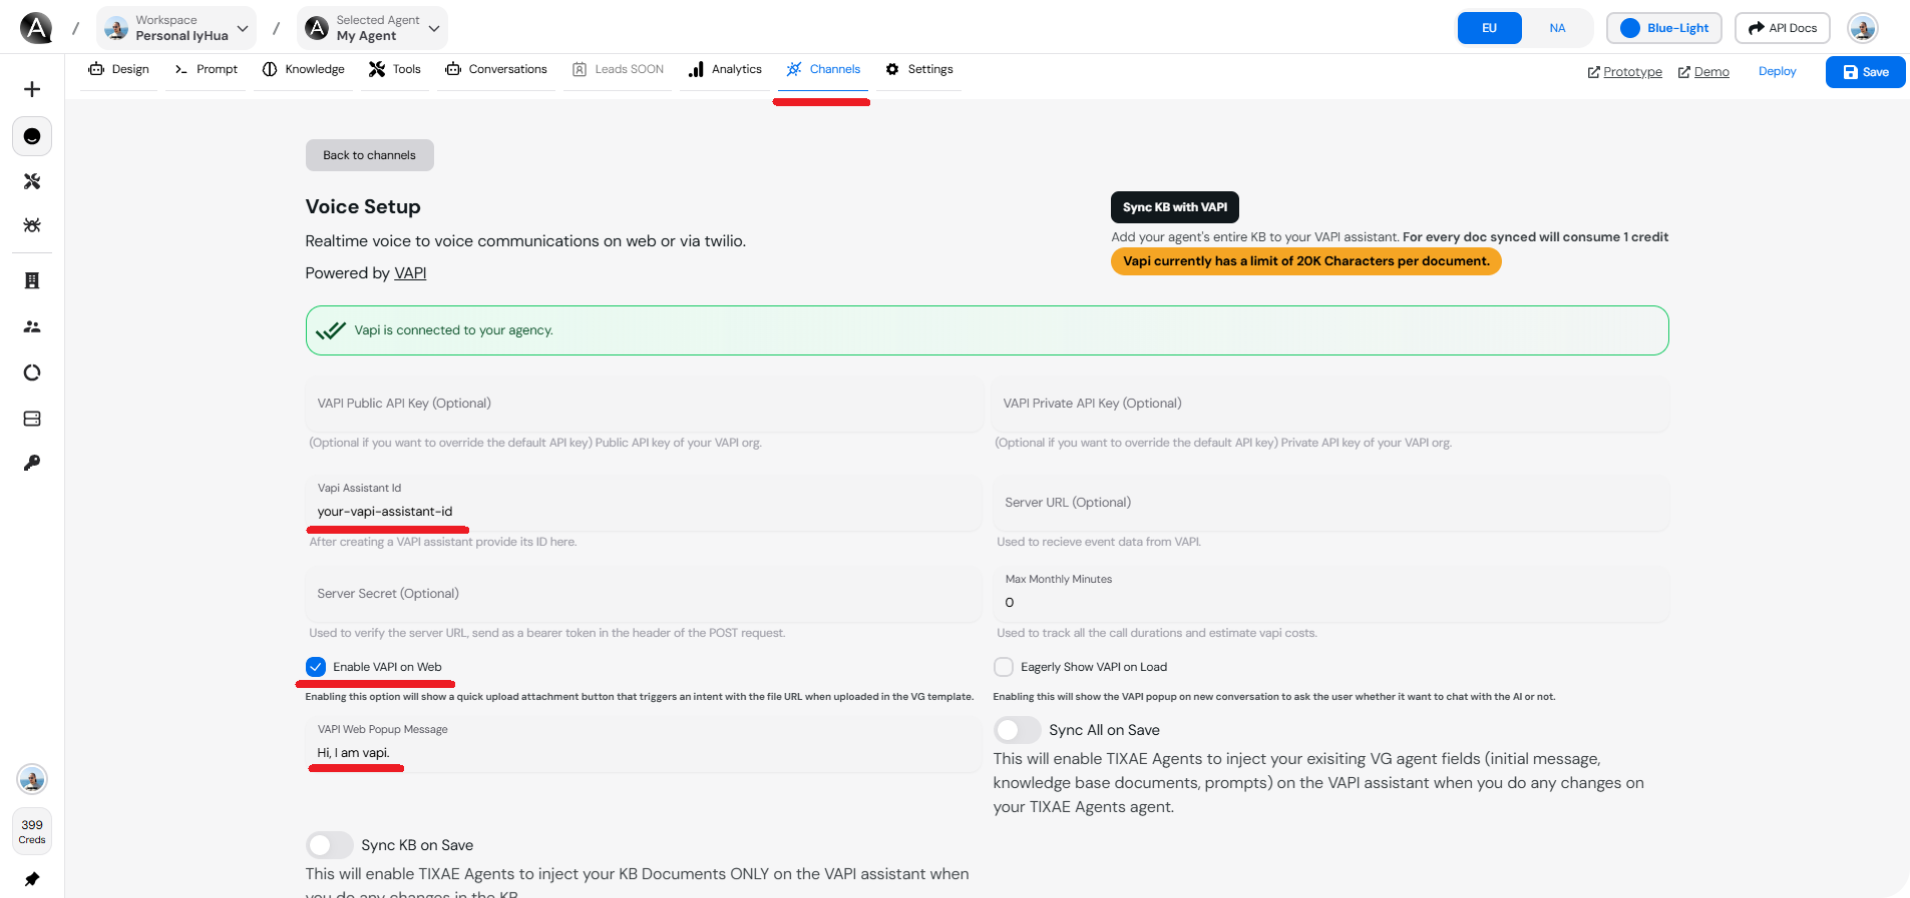
Step 4: Configure Voice Setup for the Agent on TIXAE Agents
- On your TIXAE Agents platform, select the agent you want to integrate with Vapi.
- In the agent’s details, go to the Channels page, and click on Voice Setup for the Vapi integration.
- In the Voice Setup section, enter your Assistant ID that you retrieved from the Vapi dashboard. Click on Enable VAPI on Web to enable the Vapi integration on your agent and enter your Popup Message. Then, click on Save to save the changes.
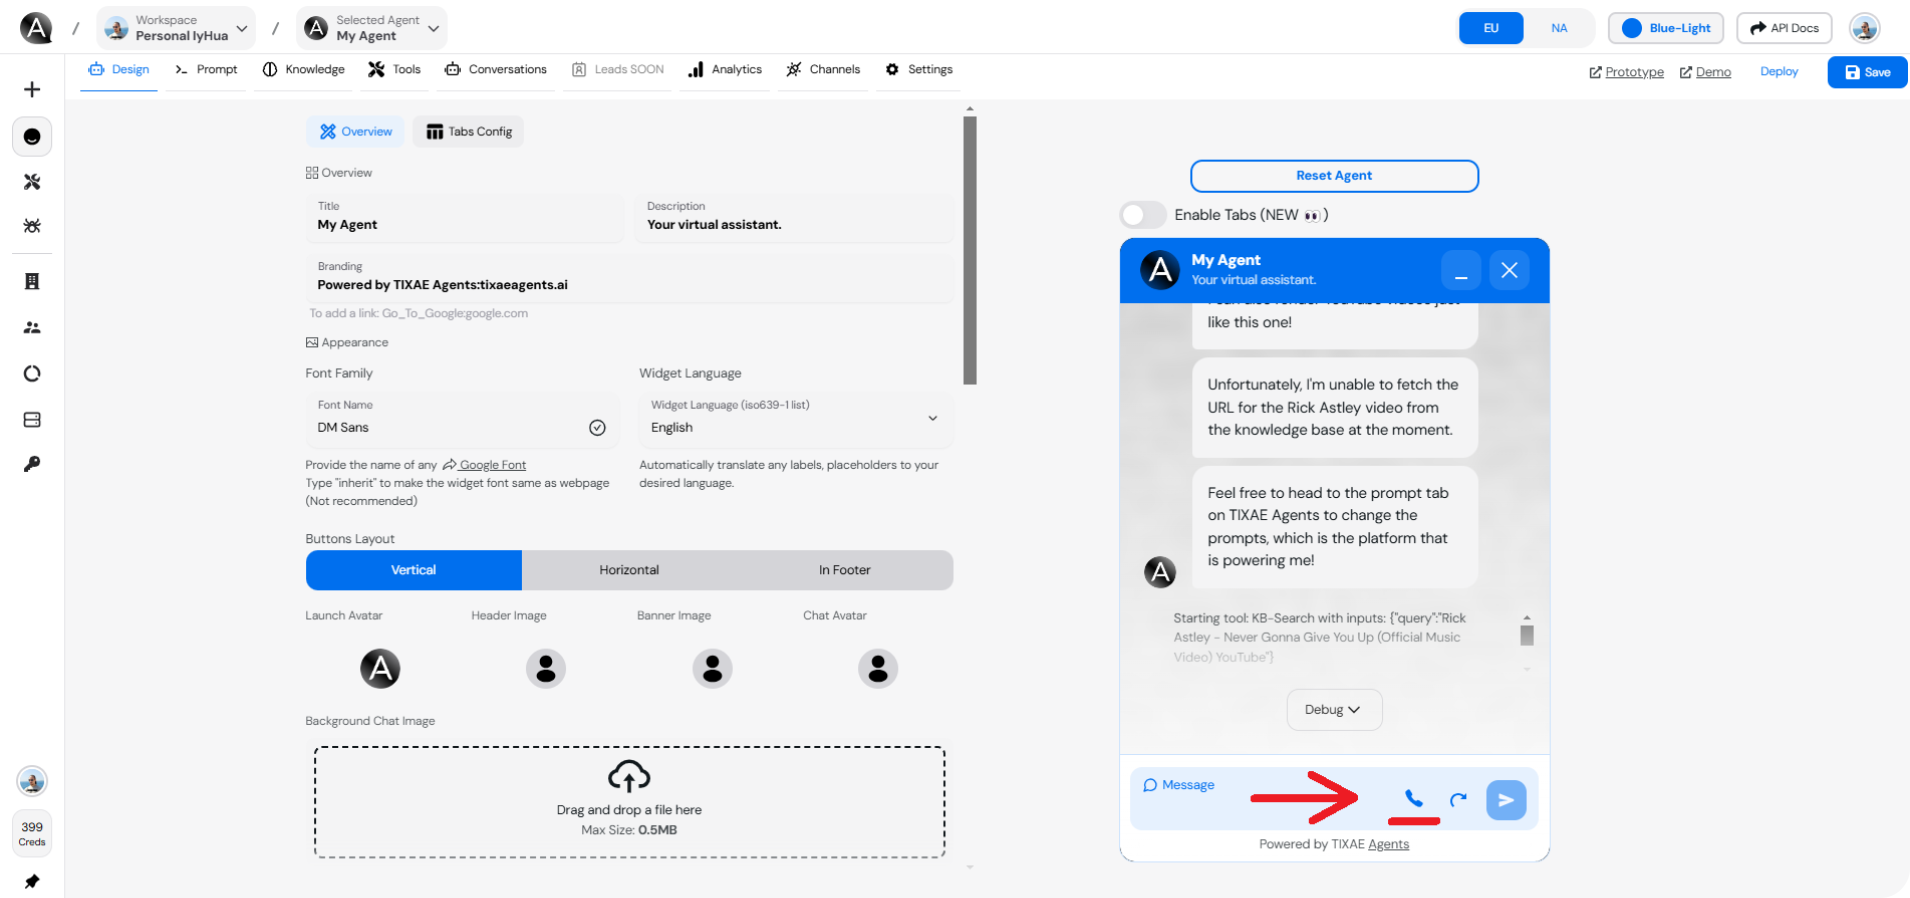
Step 5: Test the Integration
- Once the Voice Setup is complete, navigate to the agent’s Channels page.
- You should see a phone icon indicating that the Vapi assistant is ready.
- Click on the phone icon to initiate a test session and interact with the Vapi assistant to ensure it’s working as expected.
Learn More
- This tutorial video provides a comprehensive guide on connecting VAPI to your TIXAE agent:
Troubleshooting
Most integration issues can be resolved by double-checking credentials and ensuring all required permissions are in place.
- API Key errors: Double-check that you entered the correct Public and Private API Keys in both the Vapi and TIXAE Agents platforms. Ensure there are no spaces or missing characters
- Voice Assistant not responding: Ensure that the Assistant ID is correct and that your agent has been properly configured for voice interactions
- Phone icon not appearing: Verify that the Enable VAPI on Web option is checked in the Voice Setup section of your agent’s Channels page
Usage Limits and Pricing
Optimize Your Usage
Monitor your voice interaction metrics and usage patterns to optimize costs and improve performance. Check your dashboard regularly!
- Be aware of your Vapi Voice Service plan limits and associated costs
- Monitor your usage regularly to avoid unexpected charges
Security Considerations
Exposing API keys in public or client-side code can lead to unauthorized access and potential security breaches. Always follow security best practices when handling credentials.
- API Key Protection:
- Never expose your API keys in the client-side code
- Rotate keys periodically for enhanced security
- Store keys securely in environment variables
Best Practices
Creating a test environment before deploying to production can help identify and resolve potential issues early in the integration process.
- Test frequently: Before going live, thoroughly test the voice interactions to ensure a smooth user experience
- Monitor usage: Regularly monitor the performance of the voice assistant through the Vapi dashboard to identify any potential issues or improvements
- Update as needed: Make sure to periodically update your API keys and assistant settings to keep the integration secure and up-to-date