What are Edge Conditions?
Edge conditions define the logic that determines which node to route to next. These conditions are evaluated in real-time and allow for dynamic, context-aware routing. Example:- If the user says “Cancel,”
- If the user asks about “Pricing,” route to a node that integrates pricing tools.
Adding Conditions to Edges
Steps to Add a Condition
- Hover over the edge connecting two nodes and click on it.
- A side menu will appear on the right-hand side.
- In the Condition Editor, define the logic for the edge:
- Use variables (e.g.,
user_input,timestamp) to create conditional expressions. - Add multiple conditions if necessary, using logical operators (
AND,OR).
- Use variables (e.g.,
Example Condition
if user_input contains any inquiry about pricing or booking, route to a node that integrates pricing tools.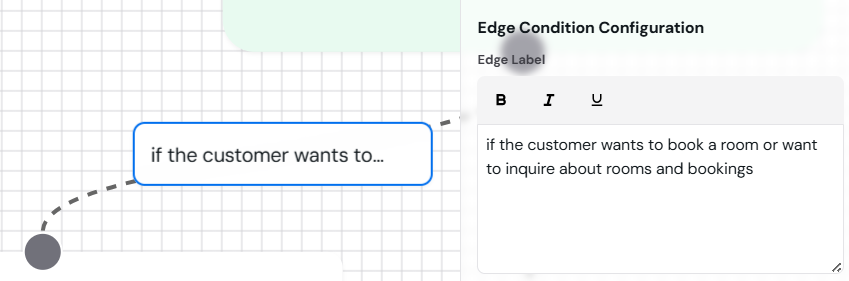 Image showing how to edit edges and add conditions.
Condition Nodes
When building a complex agent you may run into the same condition over and over again, and of course this is not v. scalable or maintainable. To make this easier, you can use condition nodes.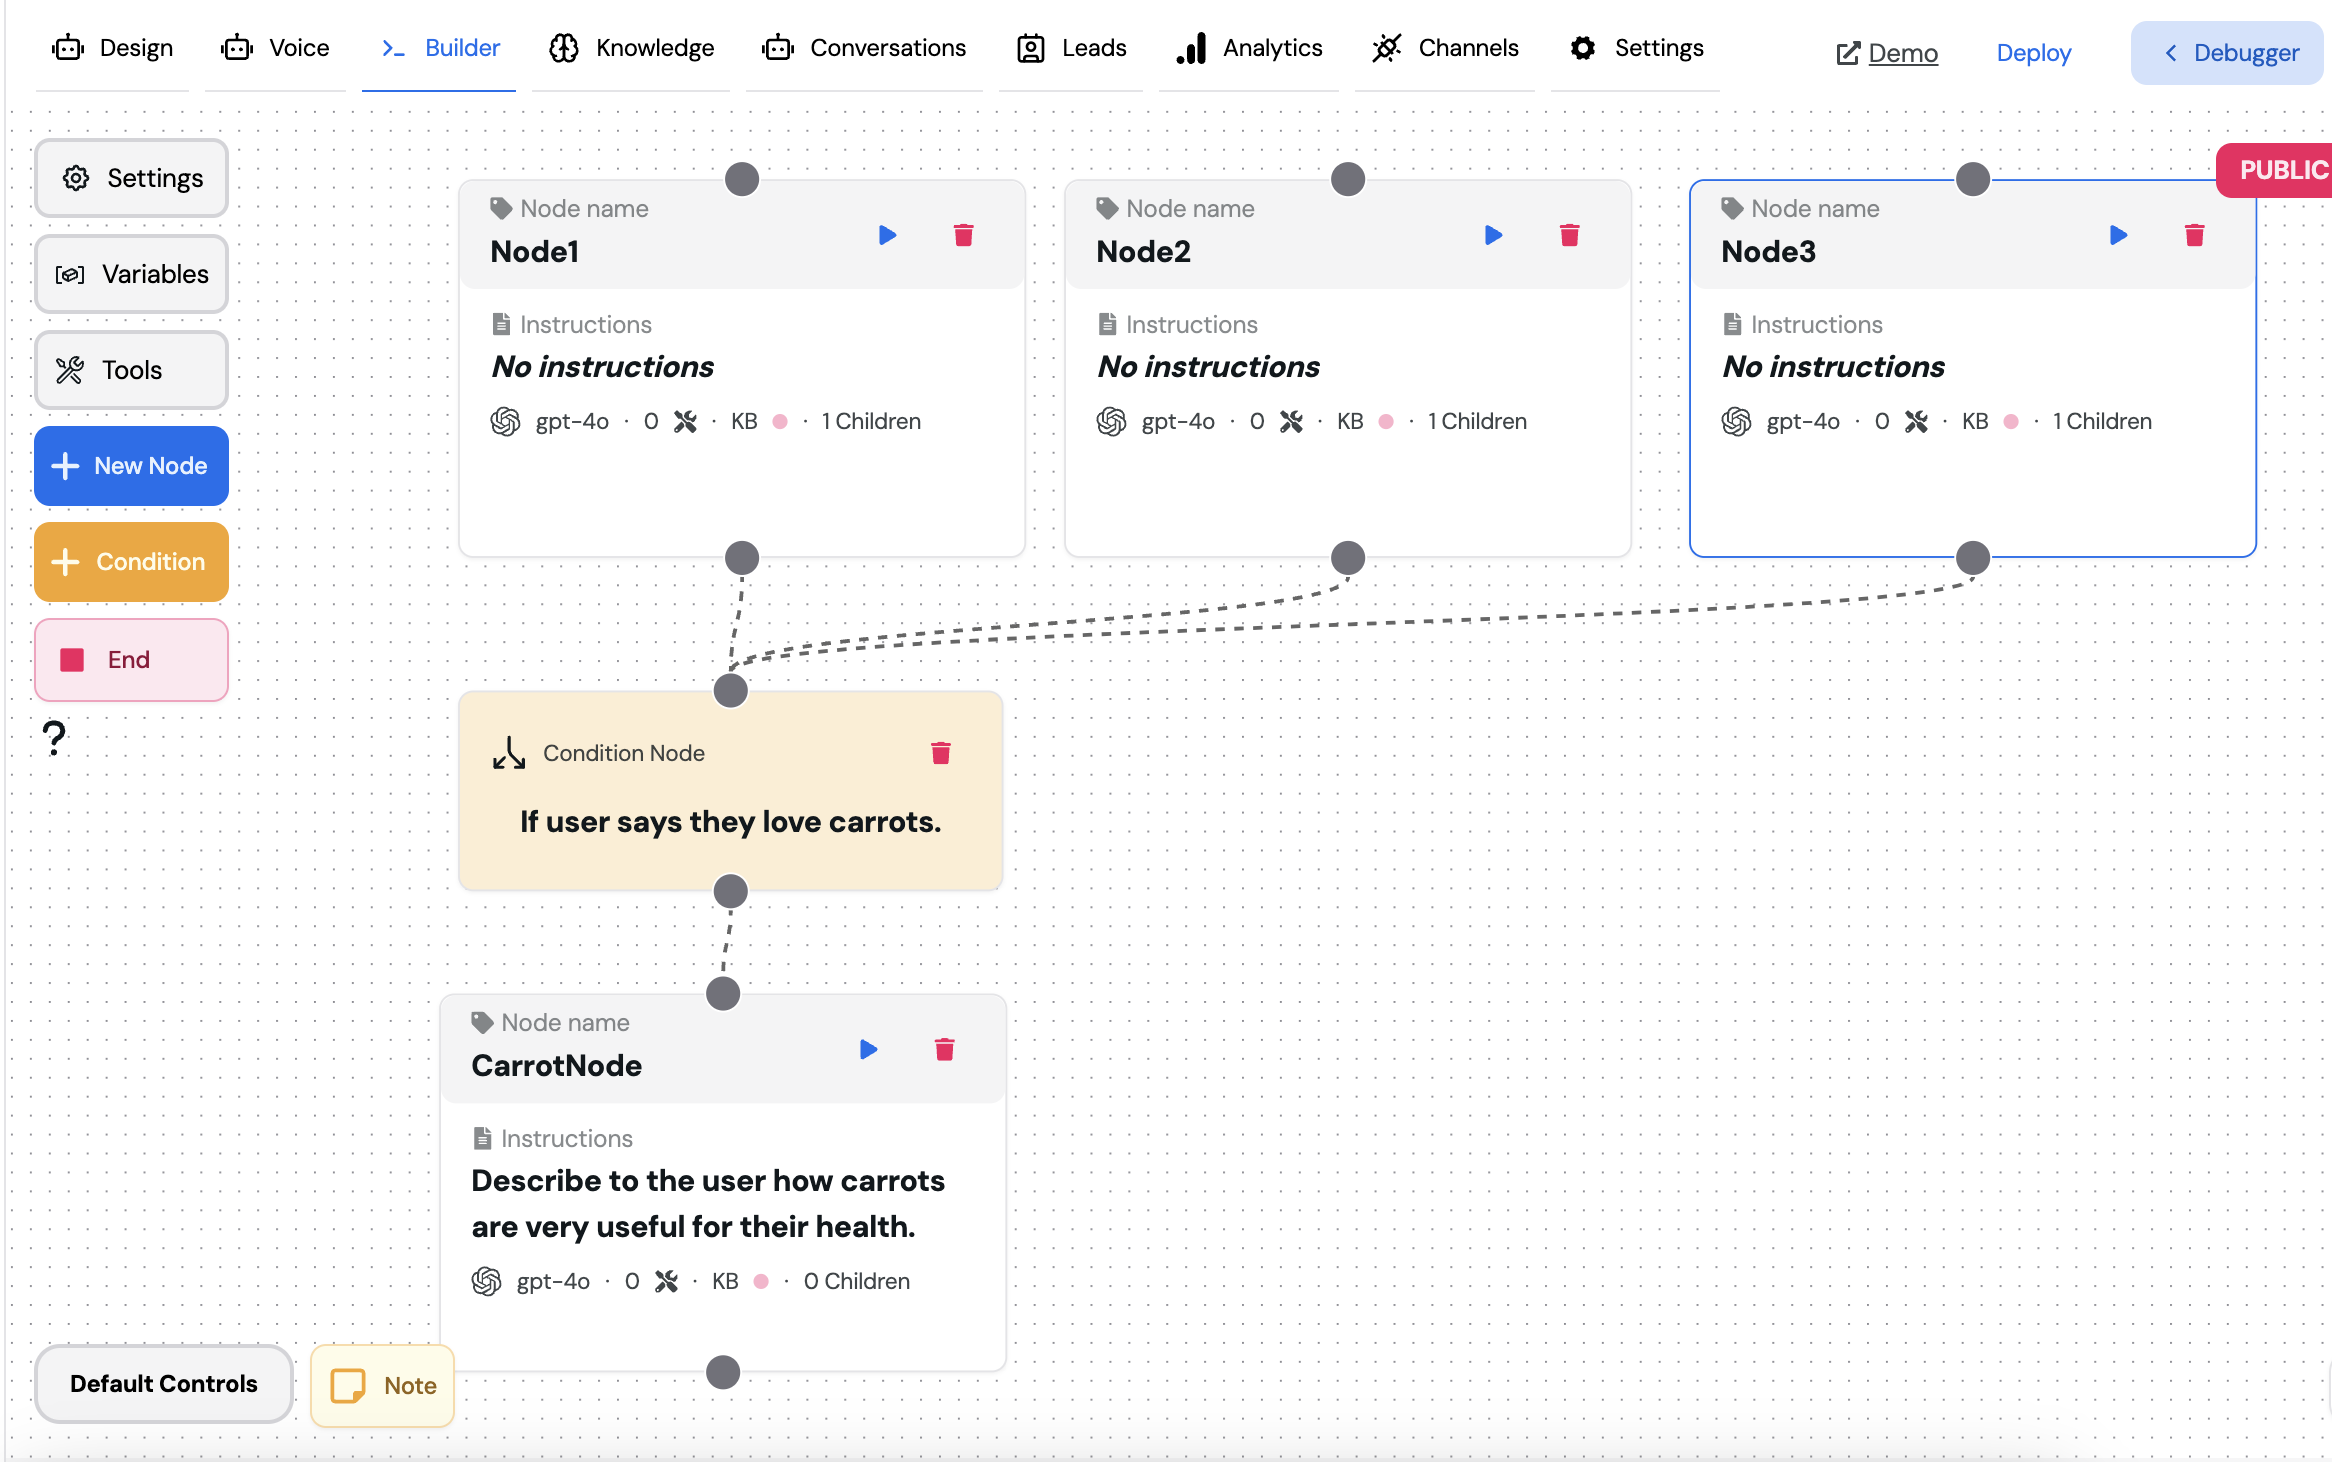 Condition nodes are a special type of node that allows you to define a condition once and reuse it multiple times in your agent, so you could easily change the condition in one place and update it everywhere unlike edge conditions which are more simpler but less maintainable.
You should always use condition nodes as much as possible since they are more maintainable and scalable.
You can’t connect a condition node to another condition node, or connect multiple outputs to a condition node, you also need to connect at least one output to the condition node or it will be ignored.