Types of Nodes
-
Start Node:
- Automatically created and unique for every flow.
- Marks the entry point of the conversation or interaction.
- Note: You can only have one start node per flow.
-
Default Nodes:
- Represent operations or decision points within the flow.
- Used to route data and manage the conversation logic.
-
End Nodes:
- Conclude the conversation, call, or chat.
- Helps in marking logical endpoints for a flow.
-
Global Nodes:
- Accessible throughout the entire flow.
- Created by toggling the Global Node switch on a default node.
- Useful for defining reusable functionality, such as shared prompts or tools.
Customizing Nodes
Clicking on any node (start, default, global) opens a menu with the following customization options:
1. Overview
- Define the node’s name and description for clarity.
- Assign specific instructions for AI behavior when routing through this node.
2. LLM Configuration
- Set parameters like temperature, token limits, and other model-specific options.
- Tailor how the AI responds within this specific node.
3. Tools Integration
- Connect tools (e.g., APIs or webhooks) to the node.
- Define the tools the AI can call when processing this part of the flow.
4. Knowledge Base
- Enable the AI to retrieve relevant information from a vector database.
- Specify the number of retrieval chunks and adjust the settings for knowledge-based responses.
5. Router Configuration
- Manage conditional logic for branching flows.
- Add conditions to define how the data moves between nodes.
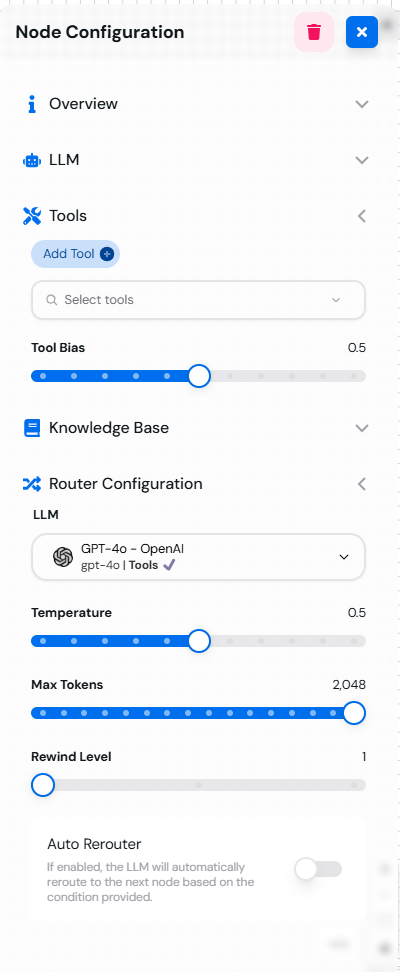 Node configuration menu showing various customization options available for each node.
Examples and Use Cases
Node Type Examples
-
Start Node Example:
- Greet the user warmly and provide a welcome message.
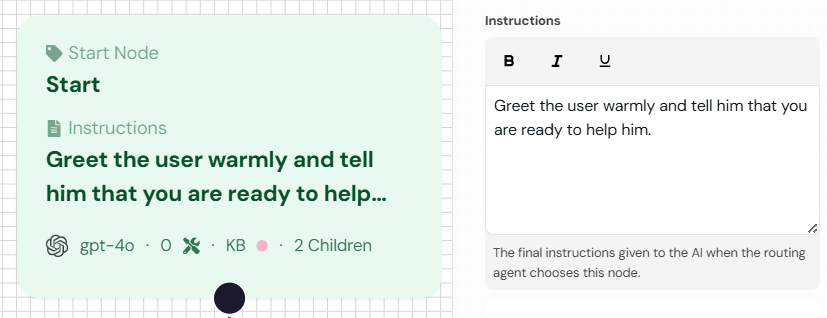
The Start Node configuration menu showing the greeting prompt setup.
- Greet the user warmly and provide a welcome message.
-
Default Node Example:
- Process the user’s input and provide a response.
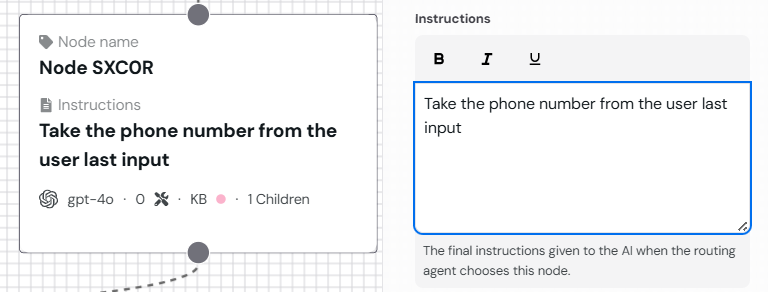
The Default Node configuration menu showing the processing prompt setup.
- Process the user’s input and provide a response.
-
End Node Example:
- Conclude the conversation with a friendly closing message.

The End Node configuration menu showing the closing prompt setup.
- Conclude the conversation with a friendly closing message.
-
Global Node Example:
- Define a shared prompt for handling “Help” requests.
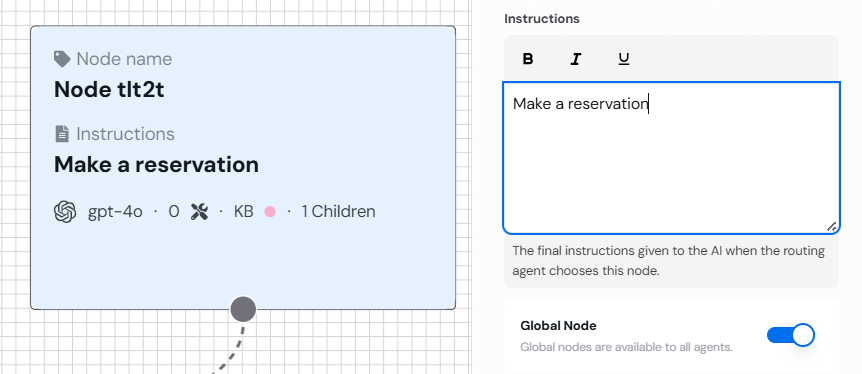
The Global Node configuration menu showing the help prompt setup.
- Define a shared prompt for handling “Help” requests.
Scheduling Assistant Example
Imagine building a scheduling assistant with the following flow:- The Start Node greets the user and identifies their intent.
- A Default Node processes the scheduling details using integrated tools.
- A Global Node defines shared responses like “Help” or “Cancel.”
- The End Node finalizes the booking or provides a summary.
Ready to create your first node? Explore the next section: Creating and Managing Nodes.