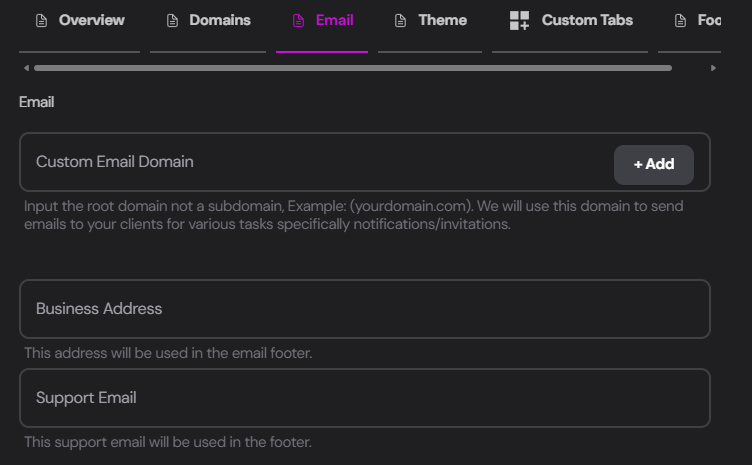
A custom email domain reinforces your professional image and enhances client trust.
Setup Process
1
Add Custom Email Domain
Input your domain in the
Custom Email Domain field and click + Add.Enter only the domain (e.g., yourdomain.com) without any protocol (https://). For example, we added tixaeagents.ai
2
Add DNS Records
You’ll be prompted to add three DNS records to your provider: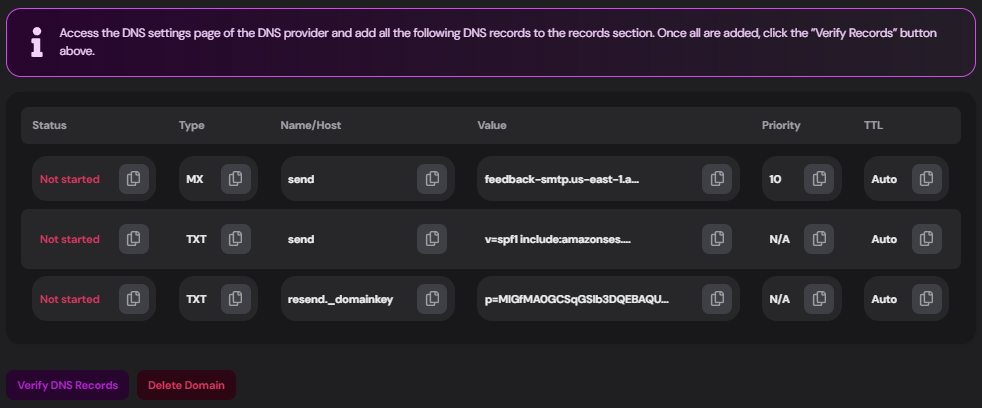 Access your DNS settings from your provider (e.g., Godaddy.com) and add the following records (keep in mind: Your records will differ):
MX Record
MX Record
TXT Record 1
TXT Record 1
TXT Record 2
TXT Record 2
3
Verify DNS Records
After adding the records to your provider, click
Verify DNS Records.If you need to start over, use the
Delete Domain button to reset the process.Good To Go
Once correctly set up, you can send notifications and invites directly from your own email domain!
Additional Email Settings
From the Email tab, you can also configure:Business Address
Enter your agency’s physical address to be included in the emails footer sent from your dashboard.
Support Email
Add your agency’s dedicated support email, which will also appear in the emails footer.
Coming Soon: We’re working on advanced features including
Lead Gen, Ticket System, and SMTP integration. Subscribe to our Newsletter to stay updated on these and other awesome development-updates;)